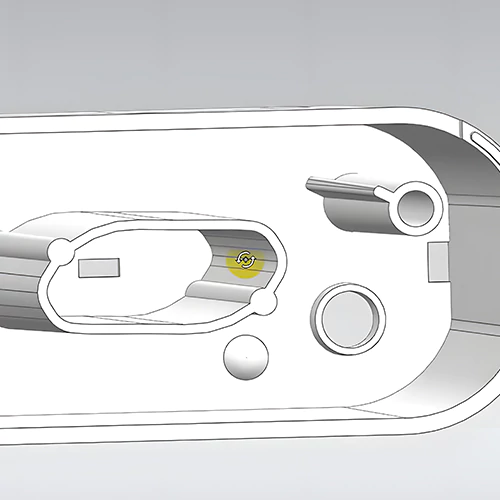
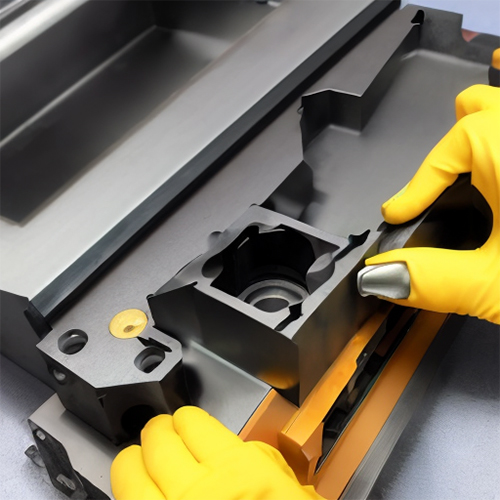
Amidst the ever-changing realm of injection molding, it’s crucial to delve into the nuances of mold design. Mold shut-offs, often overlooked but crucial, take center stage to tackle challenging tooling and design hurdles.
Think of them as the masterminds working backstage, skillfully coordinating the production of intricate part features with finesse, all without the hassle of post-molding adjustments. But that’s certainly not enough info to better use, implement, and adjust mold shut-offs in injection molding.
Hence, this article will take you through everything related to mold shut-offs to help you better understand and decode this crucial component in injection molding. So please keep reading to learn all about it!
Understanding the Shut-Off Angle
The shut-off angle is your mold’s guardian, preventing collisions between core and cavity during the delicate dance of mold closure. It’s a silent hero, saving your mold parts from potential misalignment disasters. Imagine it as the unsung protector, ensuring smooth operations by avoiding galling – the unwanted friction between metal faces.
The Purpose of Shut-Off Angle
While draft angles aid in part release, mold shut-off angles are the unsung champions preventing mold parts from unwanted rendezvous. They become particularly vital when the mold’s parting line and tooling direction run parallel.
Unlocking the Value: Why 3 Degrees Matter
The golden rule governing shut-off angles is simple yet crucial – it must be more than 3 degrees. This magic number guarantees a minimum misalignment of .010 on closing. Embracing this rule ensures a seamless molding process.
Exploring Types of Shut-Off Angles
Let’s delve into the four types of mold shut-off angles, each uniquely enhancing your injection molding experience.
Flat Shut-Off Angle: Simple Precision
The flat molding shut-off angle epitomizes simplicity and efficiency in injection molding. It engineers a flat surface, ensuring a seamless and precise seal between the core and cavity.
This type is favored for its straightforward implementation, making it an excellent choice for applications where simplicity is paramount. The flat mold shut-off angle guarantees a clean finish, reflecting the beauty of precision in molding.
Wipes Shut-Off Angle: Dynamic Elegance
Wipes shut-off angles introduce a dynamic element to the mold closing process, elevating the elegance of your injection molding experience. This type employs a wiping motion during closure, actively contributing to a clean, polished surface between mold parts.
The dynamic nature of wipe shut-off angles reduces the chances of imperfections, resulting in molded parts with a superior finish. This nuanced approach adds finesse to the art of shut-off mechanism design.
Saddles Shut-Off Angle: Versatility Unleashed
Saddle shut-off angles emerge as the epitome of versatility, unlocking possibilities in injection molding. They excel in creating complex part features without additional side actions.
This type of shut-off angle is a go-to choice for designers aiming to craft intricate elements such as holes, hooks, and long-through holes. The versatility of saddle shut-off angles broadens the design scope, providing creative freedom without compromising functionality.
Radiused Saddle Shut-Off Angle: Sealing with Sophistication
Adding a touch of curvature to the saddle shut-off angle, the radiused saddle brings a new level of sophistication to your molding endeavors. The rounded edges of this molding shut-off type enhance sealing capabilities, ensuring a smoother mold closing process.
The radiused saddle minimizes the risk of wear and tear, contributing to the longevity of the mold. This refined approach to shut-off design reflects a commitment to precision and durability, making it a valuable choice for applications demanding sophistication and functionality.

The Significance of Proper Shut-Off Design
In injection molding, the design of mold shut-offs plays a pivotal role in controlling the flow of TPE (Thermoplastic Elastomers) with precision, ensuring the creation of molded parts with impeccable geometry and preventing undesirable edge flash. Here are key components that should be considered in a proper shut-off design:
- Designing for Precision: Create shut-offs meticulously to minimize TPE’s potential for edge peeling. The general geometry should feature a sharp transition between the molded TPE edge and the supporting substrate.
- Proper Venting: The resulting TPE geometry should be designed to vent the cavity properly, preventing any trapped air that could compromise the quality of the molded part.
Strategies to Reduce Peeling in Shut-Off Design
Having peeling trouble in the shut-off you designed for your specific injection molding production needs? Consider the following:
Provide Interference Fit
Maintain an interference fit of 0.002 to 0.004 inches (0.050 to 0.101 mm), considering cosmetic needs and the flexibility of the specific plastic substrate.
Optimal Hardness
Heat treat shut-off steel to a minimum of 54 Rockwell hardness to ensure the durability and longevity of the shut-off mechanism.
Concealing TPE Edge
Consider substrate edge design to “hide” the TPE edge from the consumer, contributing to a more aesthetically pleasing final product.
Pre-Drying Materials
Pre-dry hygroscopic substrate and TPE pellets to avoid porous surfaces nearest the substrate interface, reducing the risk of defects in the molded part.
Employing Inserts
Where applicable, use molding shut-offs as inserts. This not only aids in downstream injection mold maintenance but also provides flexibility in design modifications.
Pitfalls to Avoid in Shut-Off Design
Besides shut-off peeling, various other issues may arise due to improper design of a mold shut-off. Hence, it’s important to be well aware of them to avoid their occurrence. These issues include:
Rounded Shut-Offs
Steer clear of using rounded or radiused shut-offs, as they can compromise the precision of the shut-off mechanism.
Elevated TPE Geometry
Avoid component designs where TPE geometry lies significantly above the substrate, resembling a cliff wall, as this can lead to challenges in achieving a proper molding shut-off.
Direct Placement in Mold Base
Refrain from placing shut-offs directly in the mold base, as this can impact the overall functionality and maintenance of the injection mold.
Lack of a Clear Shut-Off Strategy
Build the tool with a well-defined shut-off strategy in mind to prevent complications during the molding process.
Vent Placement
Avoid placing the vent directly at mold shut-off edges, as this can inadvertently encourage flashing, compromising the quality of the molded part.
Fundamental “Lock” of TPE to Substrate: Three Basic Methods
Chemical Adhesion
Leverage chemical adhesion to create a robust bond between the TPE and substrate. This method ensures a reliable connection, contributing to the overall integrity of the molded part.
Mechanical Design Techniques
Implement mechanical design techniques to create interlocks and intricate geometries that enhance the adhesion of TPE to the substrate. This approach provides major user benefits, including improved component abrasion resistance.
Interlocks
Utilize interlocks as a powerful method to mechanically combine TPE and substrate geometry. This technique makes separating the components during use challenging, ensuring stability and durability.
Step-by-Step Guide to Navigating Shut-Off Angles with Precision
Once you understand the key considerations for designing mold shut-offs and the related issues, it’s time to ensure precise implementation of mold shut-offs in the injection molding process. For this, you need to:
Evaluate Misalignment Tolerance
Determine the acceptable level of misalignment for your specific molding requirements, considering the complexity of the design.
Select the Appropriate Shut-Off Angle Type
Choose among flat wipes, saddles, or radiused saddles based on your design complexity and desired outcomes.
Implement the 3-Degree rule.
Ensure that your chosen shut-off angle exceeds the magic number of 3 degrees to guarantee a secure mold closure.
Regular Maintenance Checks
Periodically inspect and maintain your shut-off angles to prevent wear and maintain optimal mold performance.
Conclusion: Enhance Your Injection Molding Precision with Prototool
As we’ve explored positive shut-off nozzles, shut-off surfaces, angles, and externally actuated shut-off nozzles, it’s clear that careful design is essential for successful molding processes.
For smooth execution and expert management of shut-offs in injection molding, look no further than Prototool. As a leading CNC manufacturing and injection molding service provider, Prototool is dedicated to delivering excellence in every project. Prioritizing precision, efficiency, and environmental considerations, Prototool is a reliable partner to elevate your molding projects.
FAQs on Mold Shut-Offs in Injection Molding
What is a Positive Shut-Off Nozzle, and How Does it Benefit Injection Molding?
Positive mold shut-off nozzles are crucial in minimizing resource wastage during injection molding. Similar to their application in water delivery systems, these nozzles are strategically placed to halt material flow when not in use. Positive shut-off nozzles contribute to efficiency, cost-effectiveness, and environmentally conscious manufacturing by preventing unnecessary material discharge.
What is the Significance of a Shut-Off Surface in Injection Molding?
A molding shut-off surface holds the key to closing up through holes in injection molding by creating a seamless surface patch along a parting line. This continuous loop effectively seals the cavity, preventing material leakage. Engineers and designers can create shut-off surfaces before or after establishing parting lines in the model, offering flexibility in the molding process.
How Does a Shut-Off Angle Impact Injection Molding Design?
The shut-off angle is fundamental to injection molding design, representing the minimum angle between the core and cavity. Commonly associated with “bypass,” this angle creates openings in the molded part that would otherwise necessitate additional mechanisms like slides or cams.
Hence, understanding and optimizing shut-off angles is pivotal for achieving precise molding outcomes and avoiding complications during production.
Exploring the Role of Externally Actuated Shut-Off Nozzles in Injection Molding
An externally actuated shut-off nozzle operates independently of melt pressure, offering a dynamic solution in injection molding processes. Hydraulically or pneumatically driven, these nozzles can be externally manipulated to control the opening and closing of the melt stream.
This design allows for enhanced control and flexibility, making externally actuated shut-off nozzles a valuable component in optimizing the injection molding workflow.

