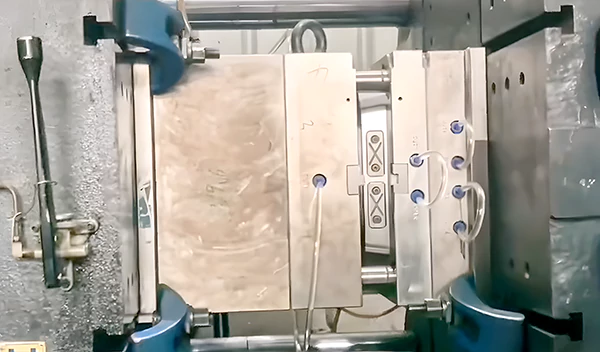
Mold closing is a crucial process in injection molding, where precision and control are paramount. This article delves into the detailed steps of mold closing, highlighting the significance of each phase to prevent mold damage and ensure the longevity and accuracy of the molds.
Initiating Mold Closing
- Starting Pressure for Mold Closing: Initially set at 25, this pressure may need adjustment if the speed is too slow. Incrementally increase the speed by +5 until the desired velocity is achieved. Be cautious, as high pressure can cause rapid movement changes in the moving platen, leading to increased friction and wear on the machine parts, affecting stability and precision.
- Starting Speed for Mold Closing: This should be set based on actual requirements, ensuring a smooth transition to the next phase without abrupt pauses. Ideally, higher speed settings with lower pressure are preferred, using pressure to control speed.
Low-Pressure Mold Closing
This phase involves using low pressure and speed to close the mold, starting from a safe distance until complete closure.
Low-Pressure Mold Closing Speed: The speed should be slow to minimize impact damage, even with low pressure settings. Sudden obstacles like misaligned sliders or broken ejector pins can cause significant damage under high-speed conditions.
Low-Pressure Mold Closing Pressure: Begin with high speed and low pressure, like 5, for testing. The mold closing speed won’t be too fast due to low pressure, allowing for gradual pressure increase to achieve the ideal protective speed.
Starting Position for Low-Pressure Mold Closing: This varies significantly based on mold size and structure, generally between 5-20 cm before complete closure. It’s crucial to start low-pressure protection early to avoid high-speed impacts from previous stages.
Ending Position for Low-Pressure Mold Closing: Set this parameter where the mold just fully closes. Initially, set the low-pressure speed and pressure, then fine-tune the position based on manual testing to ensure precise mold protection.
High-Pressure Mold Clamping
High-pressure mold clamping is a critical phase in the mold closing process, where the mold, having been brought together under low pressure, is now securely locked in place. This step ensures the mold’s stability and precision during the injection molding process.
High-Pressure Mold Clamping Pressure:
The initial setting for the clamping pressure is typically around 60. However, this value may need to be adjusted based on the specific requirements of the mold and the material being used. If the initial pressure setting does not achieve the desired results, it should be increased incrementally, in steps of +10. It’s important to avoid excessive pressure, as this can unnecessarily strain the machinery and lead to increased wear and tear. The goal is to apply just enough pressure to securely lock the mold without overburdening the equipment.
High-Pressure Mold Clamping Speed
The speed at which the mold is clamped should start at a reference value, such as 25. If the initial speed is insufficient, it can be increased gradually, but caution is advised. Increasing the speed too much can lead to excessive noise and vibration, which can be detrimental to both the machinery and the mold. The speed should be adjusted only after evaluating the effectiveness of the pressure setting. A balanced approach to adjusting both speed and pressure is crucial for achieving optimal clamping without causing damage.
Monitoring and Adjustments:
Continuous monitoring during high-pressure clamping is essential. Observing the behavior of the mold and the machine during this phase can provide valuable insights into whether the settings are appropriate or need further adjustment. Factors such as the mold’s response to pressure, the sound and vibration levels of the machinery, and the overall stability of the system should be carefully evaluated.
Final Locking Position:
The final locking position is a critical parameter in high-pressure mold clamping. This position should be set so that the mold is completely and securely closed. It’s important to ensure that the mold has reached its fully closed position before the high-pressure clamping is initiated. Incorrect settings in this regard can lead to incomplete mold closure, resulting in defects in the final product.
Safety Considerations:
Safety is paramount during high-pressure mold clamping. The high forces involved in this process require that all safety protocols be strictly adhered to. This includes ensuring that the machine is in good working condition, that all safety guards are in place, and that operators are trained to handle the equipment safely.
Conclusion: Ensuring Quality and Efficiency in Mold Closing
Understanding the nuances of mold closing, from low-pressure protection to high-pressure clamping, is essential for maintaining mold integrity and production quality. By carefully managing pressure and speed, we can prevent mold damage, ensuring efficient and cost-effective production.


