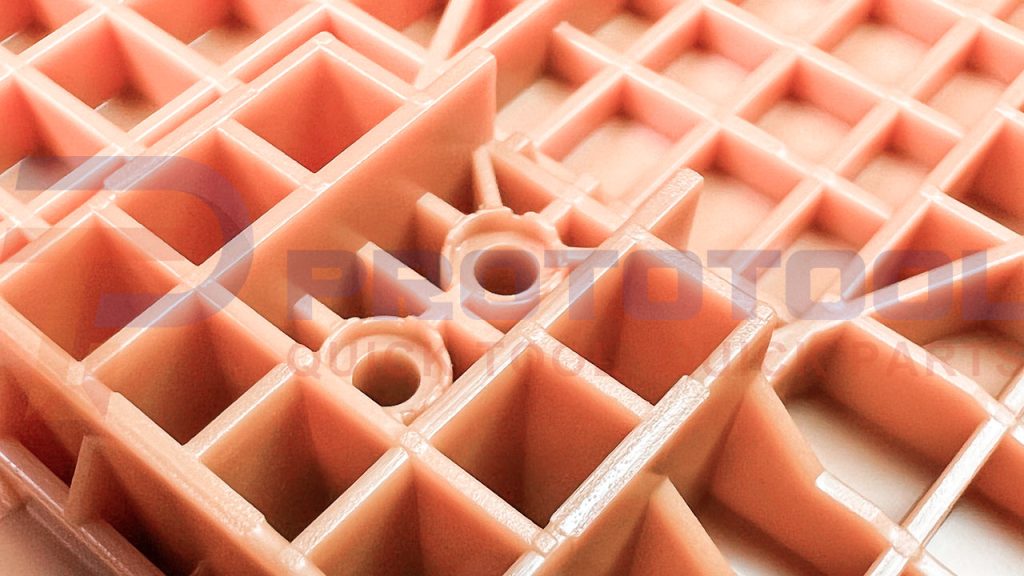
Are you concerned that you might overlook some of the most common injection molding defects during production? One of the most beneficial approaches to producing components is injection molding. Some advantages are high productivity, rapid production, adaptability to different sizes and shapes, and automated procedures. What’s more, the dimensions of injection-molded goods are often consistent. However, several injection molding flaws still endanger product quality.
This article will shed light on the numerous injection molding part flaws and the factors contributing to their occurrence. It also clarifies the many solutions you can practice to prevent these injection molding defects from affecting the product’s quality.
Most Common Injection Molding Defects:
1. Burn Marks:
One of the most common injection molding defects is “burn marks.” On molded plastic pieces, burn marks are black or rust-colored discolorations. Burn marks do not affect part integrity unless the plastic is damaged.
Causes:
Injection-molded burn marks are typically generated by trapped air or resin overheating during the injection. Overheating is frequently caused by high injection velocity or material heating.
Solutions:
- To avoid overheating, lower the melt and mold temperatures.
- Reduce the injection speed to avoid mold airlock.
- Expand gas valves and gates to let trapped air out.
- Reduce the molding cycle time so the air and resin do not overheat.
2. Flow Lines:
Flow lines on thinner areas of molded components appear as a wavy pattern, often a different color than the surrounding area. They can also appear as ring-shaped bands on the surface of a product near the mold’s “gates.” Flow marks do not affect component integrity. They can be unsightly and unpleasant in high-end sunglasses.
Causes:
Flow lines form as the material’s cooling speed changes through the mold. Material can also cool unevenly due to wall thickness, leaving flow lines.
Molten plastic cools quickly during injection, and flow marks form when the speed is too slow. While filling the mold, the plastic part hardens and gummies, resulting in the wave pattern.
Solutions:
- Increase injection speed, pressure, and temperature to fill mold before cooling (common injection-molded flow line remedy).
- To maintain flow rate and prevent flow lines, round bends where wall thickness increases.
- Moving mold gates helps to keep material from cooling too quickly during flow.
- Increasing the nozzle diameter increases flow and prevents premature cooling.
3. Air Voids:
In-molded parts, vacuum voids are injection molding defects that refer to trapped air bubbles. Voids are considered a “small” quality control concern. Larger or more numerous voids might weaken the molded item since air is present where molded substance should be.
Causes:
A common cause of voids is insufficient molding pressure. When the material near the mold wall cools too quickly, it solidifies and pulls toward the outside, resulting in an abscess. Voids may arise when the density of material changes from liquid to solid. More voids are present in molded products thicker than 6 mm.
Solutions:
- To avoid voids, increase injection pressure to remove trapped air.
- To reduce air bubbles, use a low-viscosity material.
- To avoid premature cooling, place gates near the thickest parts of the mold.
4. Warping:
When injection-molded components shrink unevenly, warping develops. If unequal shrinkage stresses different areas of the molded component, plastic and other materials can bend during the cooling process. When the overstressed element cools, it bends or twists. When lying flat, a component that is supposed to be flat leaves a gap.
Causes:
Injection-molded plastic and other comparable materials distort due to rapid cooling. Overheating or molten material with low thermal conductivity can exacerbate the problem. Warping can occur when mold walls are not consistently thick because shrinkage rises with wall thickness.
Solutions:
- Make sure that the material cools slowly enough to prevent uneven strains.
- Reduce the material or mold’s temperature.
- Consider using a non-shrinking material like particle-filled thermoplastics that shrink much less than semi-crystalline materials or unfilled grades)
- For cooling stability, redesign the mold with continuous wall thickness and part symmetry.
5. Sink Marks:
Sink marks are small depressions on the smooth surface of a molded object. When the interior half of a molded component shrinks, it draws material from the outside in.
Causes:
Sink markings produce the inverse of vacuum voids. The material cools too slowly near the part’s exterior. Shrinkage forces the outer material inside before it cools, resulting in a depression. Sink marks, like voids, are more common in thicker components.
Solutions:
- To cool the surface material, increase the holding pressure and duration.
- Cooling minimizes shrinkage.
- Thinner mold walls accelerate surface cooling.
6. Jetting:
Jetting is another common injection molding defect caused by excessive injection pressure. Molten polymer injected through a small gate at high pressure frequently squirts through the gate rather than gradually filling the mold cavity. As this first line of material hardens against the mold walls, the remaining mold material pushes it back, leaving impressions on the finished item.
Causes:
Jetting is a molded component deformation that occurs when an initial “jet” of molten material solidifies before the hole is filled. Jetting occurs on the finished component as a squiggly line, usually from the injection gate. Visible flow may weaken a component.
Solutions:
- Reduce injection pressure to prevent material from squirting into molds too quickly.
- Increasing the temperature of the material and the mold to prevent early jet solidification
- Making the mold so that the material is injected transverse rather than longitudinally
7. Weld Lines:
Weld lines emerge when molten material converges in a mold after splitting. The hair-like weld line is caused by poor material bonding, which reduces part strength.
Causes:
Polymer or molten material fronts colliding must retain a specific temperature. Otherwise, they become partially solidified and fail to bind sufficiently, resulting in weld lines.
Solutions:
- Temperature rises prevent partial solidification in molded-part weld lines.
- Delay mold cooling by increasing injection speed and pressure.
- Remove any mold barriers.
- For faster flow and less cooling, use a lower melting point or viscosity material. Jetting
8. Discoloration
A molded item is discolored when it is the wrong color. The discoloration is frequently limited to a few streaks on a molded item. This deformity does not affect strength.
Causes:
Discoloration, as one of the injection molding defects, can be caused by leftover pellets or resin from a previous production cycle. Other difficulties include the coloring ingredient’s poor heat stability or improper masterbatch mixing.
Solutions:
- Ensure that the hopper, nozzle, and mold are cleaned between production runs.
- Use a purging compound to clean the machine.
- Make sure that you or your supplier is using a reliable colorant.
- Mix the masterbatch evenly for a consistent hue.
9. Short Shot:
A short shot occurs when molten material does not fill a mold. The incomplete molded part cools. In a short shot, incomplete plastic shelves or missing fork prongs may appear. Short shots are a significant fault that can impact the function or appearance of the part.
Causes:
Most short shots are caused by flow constraints from narrow or blocked gates. When the substance is too cold or dense, it is only sometimes possible to fill it before cooling. Air pockets might obstruct flow, and injection pressure can be minimal.
Solutions:
- To enhance mold flow, widen channels or gates.
- Increase injection speed, pressure, or base material thickness to improve flow.
- Raise the temperature of the mold to slow material cooling.
- To discharge trapped air, add or extend mold vents
10. Delamination
The next injection molding defect on our list is delamination. Delamination refers to thin layers on a molded item that separate or peel away from the underlying substance. Delamination is a flaking flaw, similar to flake mica. This flaw has a substantial impact on the component’s strength.
Causes:
The most prevalent cause of delamination is the contamination of resin pellets or base material. Two non-binding materials flake apart. It can also occur when ABS and polypropylene combine. In such a scenario, material strength loss is hazardous to safety-critical parts.
Extra-releasing agents used to extract components from the mold could also be a source of infection. Delamination can also be induced by inadequate drying before use.
Solutions:
- In extreme moisture, increase the mold temperature or pre-dry the material.
- Personnel should carefully store and handle resin pellets or base material to avoid contamination.
- Consider changing the injection nozzle to utilize a less-releasing agent.
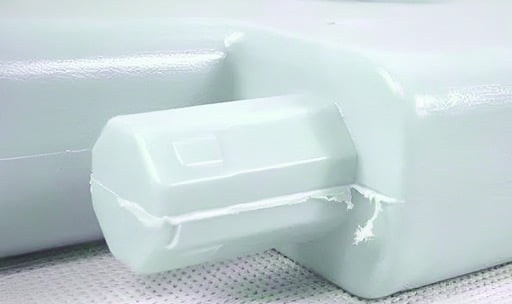
11. Flash:
A flash is another one of the injection molding defects, which is the surplus of molding material that forms a thin lip or protrusion at the border of a component. Material flows outside the defined flow pathways into the tooling plates or injector pin. Flash is usually minor, but it might be a significant problem if it is visible. Trimming flash is frequently done as part of reworking a molded product.
Causes:
Poorly designed or damaged molds cause flash. Mold temperature or injection pressure can also induce flash. When the clamping force between the plates is insufficient, the material can pass between them.
Solutions:
- Retooling or redesigning if mold plates do not fit or material spills out.
- Increase the clamping force to direct material flow.
- Adjust the mold temperature, injection pressure, and ventilation to improve material flow.
Conclusion:
The above are the most common injection molding defects. More or less, their appearance is related to the choice of materials or production problems you may encounter. Following the preventive measures discussed with each defect, you can ensure that none of these defects occur during the injection molding phase.


