Ever felt a bit lost in the world of face milling, unsure which tool suits your precision needs? If the sound of milling machines is your thing, you’re not alone. This brief guide is here to help.
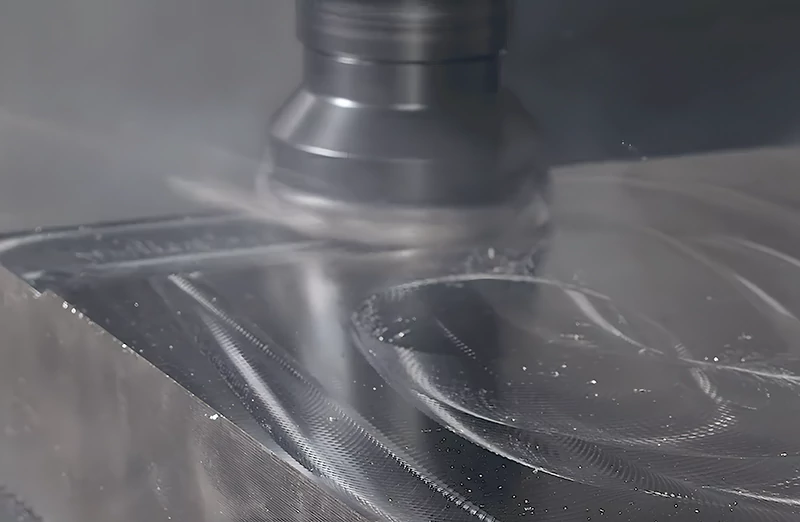
Face milling, where the cutting tool meets the surface at a perfect angle, creating those smooth flat surfaces, can be tricky.
Exploring Face Milling vs Peripheral Milling: A Comparative Analysis
In milling, the choice between face milling and peripheral milling can significantly impact your machining outcomes. Let’s delve into the nuances of each method, uncovering their unique characteristics.
| Aspect | Face Milling | Peripheral Milling (Slab Milling) |
| Cutter Orientation | The cutter is positioned perpendicular to the milling part, allowing for a direct engagement with the workpiece. | The cutter is aligned parallel to the part, grinding away at the top of the workpiece from the sides. |
| Contact Point | In face milling, the cutter’s tip directly engages with the workpiece surface during machining. | The sides of the cutter come in contact with the top surface of the workpiece, initiating material removal. |
| Cutting Method | Face milling completes cutting using the flat face of the milling cutter, whose axis is perpendicular to the workpiece surface. | Peripheral milling accomplishes cutting using the peripheral teeth of the cutter, which grind away material from the workpiece. |
| Cutter Teeth | Cutter teeth are strategically placed on both the periphery and the face of the milling tool in face milling. | In peripheral milling, teeth are exclusively located on the periphery of the cutter, contributing to material removal. |
| Cutting Focus | Face milling primarily relies on peripheral teeth for cutting, while the face teeth provide finishing operations. | Peripheral milling is mainly used for machining flat surfaces, with the cutting focus on the axial contour of the cutter. |
| Machine Compatibility | Face milling is versatile and applicable on both horizontal and vertical spindle machines. | Peripheral milling is generally performed on horizontal spindle machines. |
| Material Removal | Face milling is ideal for precision machining requiring minimal material removal, providing a superior surface finish. | Peripheral milling excels at efficiently removing large amounts of material, prioritizing efficiency over surface finish. |
| Ideal for | Face milling is preferred when precision is crucial and minimal material removal is required for a superior surface finish. | Peripheral milling is the go-to choice when substantial material removal is the priority, emphasizing efficiency in machining. |
How to Conduct Successful Face Milling? Explained
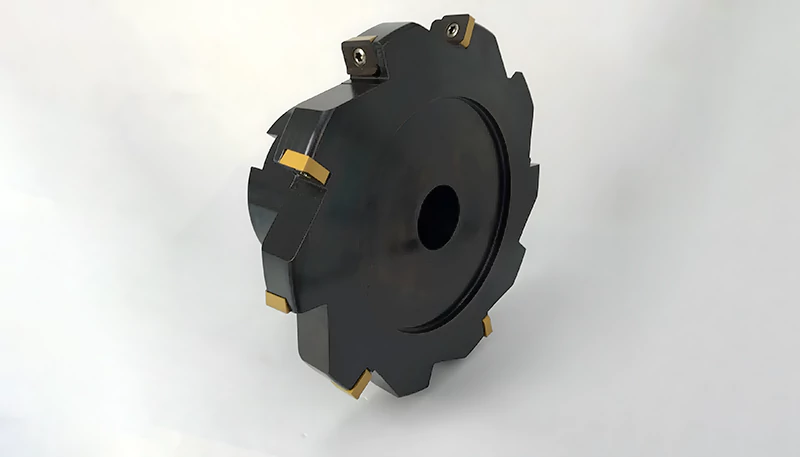
Face milling employs an array of cutters, including those with a 45º entering angle, round insert cutters, square shoulder cutters, and side and face mills. Choosing the right tool is pivotal for optimal productivity.
Choice of Tools: Exploring Face Milling Cutters
Understanding the cutter concepts is crucial. The diagram below illustrates the main application areas, considering the cut, ap, and feed depth per tooth, fz.
- 10°–65° Face and Plunge Milling Cutters: Wide-ranging cutters suitable for face milling and plunge milling operations.
- 45° Cutters: Ideal for general purposes, reducing vibrations, and enabling a chip-thinning effect.
- 90° Cutters: Suitable for thin-walled and weak-fixtured components, providing a 90° form when necessary.
- Round Insert and Large Radius Cutters: Versatile tools with excellent ramping capabilities for demanding face milling processes and profiling operations.
Types of Operations
Intermittent Face Milling
- Application: Surfaces with interruptions.
- Recommendations: Avoid frontal milling over interruptions. If unavoidable, reduce the feed rate by 50% over the interrupted area.
Face Milling of Thin-Walled Sections
Considerations: Main cutting forces, axial-weak components, cutter selection.
Tips:
- Use a 90° shoulder milling cutter for axial-weak components.
- Alternatively, employ a light-cutting face milling cutter.
- Avoid small axial depths of cut (<0.5–2 mm) and use a coarse-pitched cutter.
Edging of Thin Sections
- Positioning: Off-center for smoother cuts.
- Factors: Cutter pitch, insert geometry and low-cutting data.
- Recommendations: Choose a smaller insert radius, shorter parallel land, and low-cutting data for optimal results.
Application Checklist and Hints
- Roll into Cut: Consider machine stability, spindle size, and type.
- Cutter Diameter: Maintain 20–50% larger than the workpiece.
- Chip Formation: Apply down-milling for favorable chip formation.
High-Feed Milling: Pushing Productivity Boundaries
High-feed milling involves cutting speeds exceeding 1,000 m/min and high table feed, vf. Applicable in specific scenarios, demanding distinct considerations.
Choice of Tools
- Max. Cutting depth (ap): 1.2–2 mm.
- Cutter Diameter (DC): 25–160 mm.
- Materials: Suitable for various materials.
High-Feed Cutters
- Productive high-feed face mills with a 10° entering angle.
- High feed rates at small depths of cut.
- Optimized for high-speed machining of hardened steel.
- Ideal for roughing to semi-finishing contours and asymmetrical configurations.
Round Insert Cutters
- Increased chip-thinning effect at the reduced axial cut.
- Suitable for various conditions.
- General-purpose cutters for tough or light conditions.
How to Apply High-Feed Milling?
- Cutters with Small Entering Angle: Dramatically increase feed with chip-thinning effect.
- Dimensions, mm (iC, R, b, ap, x): Ensure a low entering angle and reduce chip thickness.
Heavy-Duty Face Milling: Conquering Tough Challenges
Heavy-duty face milling tackles rough milling of heavy materials, demanding robust tools capable of handling high temperatures and forces.
Choice of Tools
Entering Angle (κr): 60° for optimal performance.
Round Inserts: Max cutting depth of 13/18 mm.
60° Heavy-Duty Milling Cutters
- Efficient tool handling for short downtime.
- Cut capability up to 18 mm for metal removal and machining uneven surfaces.
- High productivity with feed rates of 0.4–0.7 mm per tooth.
45–90° Medium-Duty Milling Cutters
- Lightest cutting ability.
- Cutting depths of 6–8 mm within a feed range of 0.2–0.6 mm.
- First choice for medium-duty face and shoulder milling.
Large Round Inserts Cutters
- Medium-duty cutter with strong edges for tough conditions.
- Eight cutting edges for optimal performance.
- The maximum depth of cut is 10 mm.
How to Apply Heavy-Duty Face Milling?
- Entrance into the cut is critical; program for rolling into the cut.
- Cutter position and size considerations for multiple passes and optimal surface finish.
- Be observant of high temperatures; maintain chip evacuation for prolonged tool life.
Finishing with Wiper Inserts
Choice of Tools
Entering Angle (Kr): 45°, 65°, 90°.
Surface Finish (Ra): < 1.0 for various materials.
Wiper Edge Inserts
- Different lengths and versions are available.
- Grades for most workpiece materials.
- Adjustable insert seats for specific applications.
Application
- Increase feed 2–3 times with wiper inserts for improved surface quality.
- Use high cutting speed, cutting fluid, or oil mist for different materials.
- Compensate axial run-out with the crowned wiper land for a step-free surface.
4 Key Tips for Enhancing Face Milling Efficiency
To ensure seamless face-milling processes and achieve optimal results, consider the following practical tips:
1. Cutter Selection for Precision
Choosing the right cutter is pivotal for successful face milling. Tailor your selection based on the material characteristics, desired surface finish, and the specific milling machine used. Opt for cutting tips with sharp edges, fewer teeth, and a positive rake angle, which is ideal for refined finishing operations.
2. Fine-Tuning Cutting Parameters
The optimization of cutting parameters is key to balancing efficiency and quality. Fine-tune spindle speed, feed rate and cut depth according to your machining requirements.
While higher spindle speeds and increased feed rates boost throughput, be cautious not to compromise precision. Aggressive parameters may lead to subpar quality, diminished accuracy, poor surface finish, and accelerated tool wear.
3. Mitigating Vibrations for Quality Finish
Vibrations threaten surface finish and tool longevity, potentially causing tip breakage. To counteract this, prioritize effective tool clamping and ensure robust machine/workpiece rigidity. Minimizing vibrations enhances surface quality by reducing chatter during top milling.
4. Implementing Efficient Cooling
Proper cooling is crucial to prevent heat buildup and chip accumulation on the cutting tool. Employ an appropriate coolant to facilitate efficient heat dissipation during cutting. An effective cooling system prolongs tool life and swiftly removes cuttings, contributing to an improved surface finish.
Conclusion
In this guide, we’ve delved into high-feed milling, exploring its potential to boost productivity and precision, and we’ve demystified the art of finishing with wiper inserts for that perfect surface finish.
Remember, choosing the right tools, adjusting your cutting settings, and ensuring your machine is stable are your allies in this frontal milling adventure. No matter your experience level, our guide simplifies face milling, giving you the knowledge and confidence to effectively use this method.
Armed with these simple yet powerful tips, you’re ready to elevate your face-milling game. Precision in milling is not just a skill; it’s your journey to becoming a machining master.
That being said, if you’re still stuck somewhere and need professional help, Prototool has your back! Count on our professional manufacturers at Prototool for reliable, efficient, timely milling and custom CNC manufacturing services to cater to any needs. Get in touch today!


