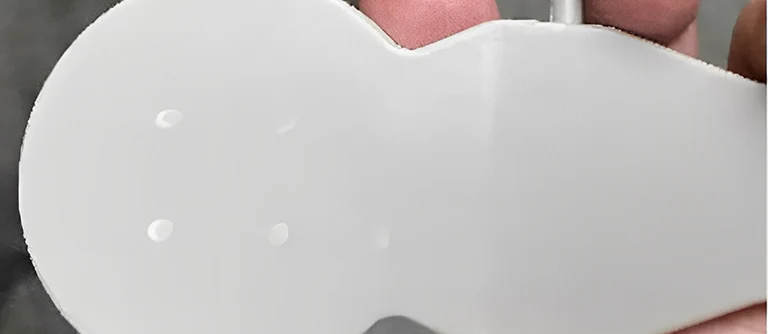
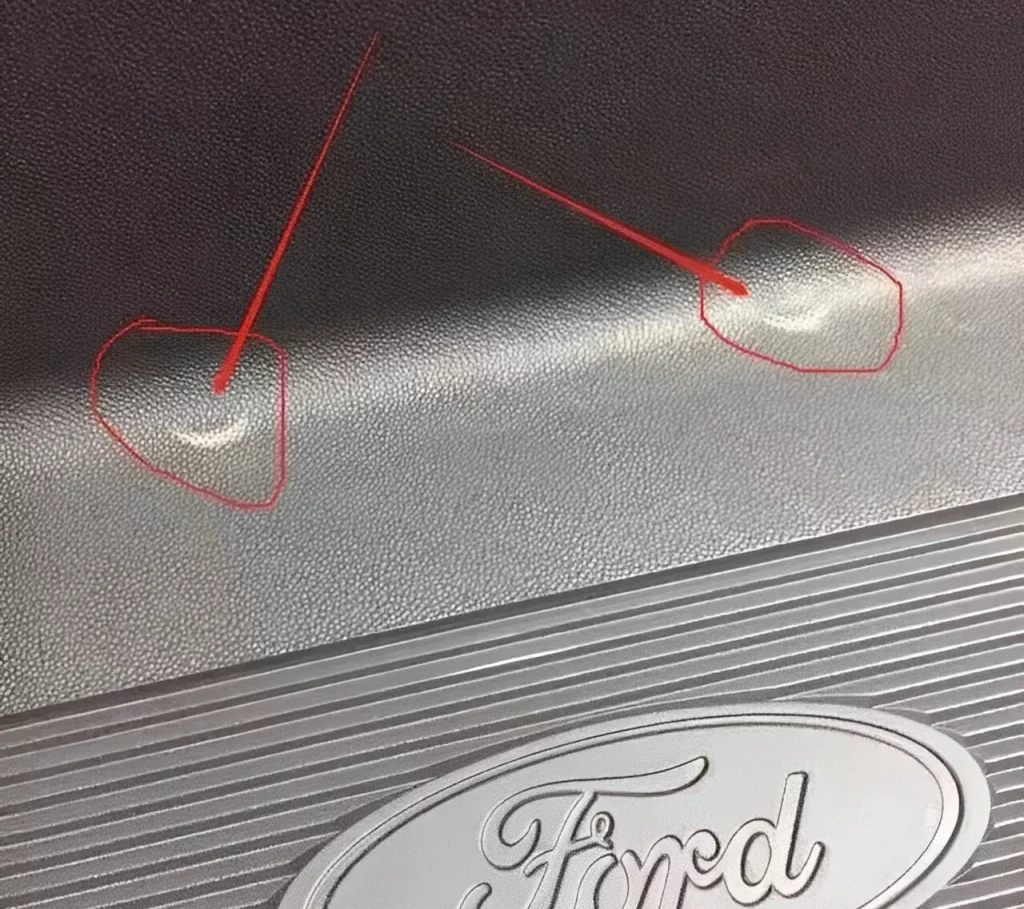
People typically define ejector pin markings as glossy or white impressions on the surface of an injection-molded object. These markings exhibit various levels of glossiness, including dark or shadow-like impressions without any convex or concave features. People can observe these markings directly opposite the ejector pin location. This detailed guide will explore the cause and solutions of ejected marks.
What is an Ejected Mark?
An ejected mark, also known as an ejection mark or ejector mark, is a common issue that can occur on injection molded products. It refers to a visible indentation, depression, or blemish on the surface of a molded part caused by the ejection process.
During injection molding, the molten plastic material is injected into the mold cavity and solidified to form the desired shape. Once the part has cooled and solidified, it must be ejected from the mold. The ejection process involves using ejector pins, ejector plates, or stripper plates that push against the molded part, separating it from the mold walls.
Ejected marks typically occur at the locations where the ejection system contacts the part, leaving a visible impression or mark on the surface. These marks can vary in size and shape, ranging from small dimples or depressions to more noticeable indentations or lines.
Also Read: A Simple Guide to PVC Injection Molding Process

Causes of an Ejected Mark:
Below are the issues that may cause an ejected mark to occur on an injection-molded product:
1. Product Design:
The composition of the raw material and the finished product’s structure will determine whether the product’s wall thickness has been developed suitably. In most cases, the minimum acceptable thickness for a product with a straightforward construction is 2.5 millimeters. In comparison, the thickness must be no less than 2.8 millimeters for specific products with complicated structures, defined as products with more ribs in the cavity.
2. Mold design:
When they are first created, the sizes of the nozzle and runner are typically not made to be excessively huge. This is done so that raw materials may be saved and further mold adjustments can be made with more ease. Please note that people can only change and increase the sprue and runner sizes when the injection parameters are too high. Otherwise, if design vents are not implemented at the runner end, it may lead to the occurrence of other severe issues.
People can appropriately increase the sprue and runner sizes to alleviate the overshooting of injection pressure and other parameters caused by filling difficulty when ejector marks appear on the product.
Because the internal tension surrounding the gate is the highest, positioning it so that it is easy to fill the cavity and as far away from the ejector as feasible is optimal. Additionally, resin filling should be as uniform as possible to guarantee that the stress is distributed evenly throughout the structure.
The prevalence of ejector markings is significantly related to the ejector type, its arrangement, size, location, and the number of ejectors. When the product is expelled, the design should guarantee that uniform force is placed on the ejector pin, which should be the appropriate size. For instance, the places that include deep ribs, also known as the areas in which it is more difficult to eject the product, require a higher level of effort when it comes to the ejection process. Additionally, the ejector pins have to be built in such a way that they attach to the ribs.
It is required to set the stress points on the deep ribs of products with deep ribs to avoid ejector marks created by excessive force during product ejection. These markings can be seen on items that have deep ribs.
The design of the placement of the ejector pin should consider two factors: first, whether or not the pin is expelled at the point of maximum tension, and second, whether or not the pin is balanced.
3. The Settings for the Machine:
a. The choice of injection molding machine An incorrect selection of the injection molding machine is another factor that can contribute to the development of internal tension. It is a fallacy to believe in decreasing the internal stress of the product by using a large-capacity injection machine to inject products with a tiny mold. There are situations when excessive pressure and an improper nozzle structure might produce substantial internal tension.
b. Ejector marks on molded products are inevitable due to the characteristics of the molding process. However, people can minimize ejector marks by appropriately controlling process conditions. Factors influencing ejector marks include mold and processing temperature, injection speed, pressure, holding time, cooling duration, and more. Among these factors, temperature, pressure, speed, and time are the most significant. Ejector marks can be minimized by controlling the molding process.
c. The temperature during processing.
d. Pressure, rate, and duration of the injection.
e. Holding pressure and holding time: For holding pressure, utilize this parameter to change it when the product has been injected for more than 90% of its total volume. There are situations when it is possible to lessen the orientation stress by decreasing both the holding pressure and the holding period. At this point, you will notice that the ejector marks have undergone a significant amount of improvement.
f. More time was needed for cooling. Before reaching the plastic material’s highest ejection temperature, premature ejection increases the likelihood of ejection defects like convex or penetration. This can happen if the product is expelled too early.
Related: Injection Molding Machine: Types, Brands, Prices, And Q&A
How to Solve Ejected Mark Issues on Injection Molded Products?
To solve ejected marks in injection molded products, you can follow these steps:
Analyze the Mold Design:
Start by analyzing the mold design to identify any potential areas that could contribute to ejected marks. Look for sharp corners, thick sections, or inadequate venting that may cause trapped air or material flow issues during ejection.
Adjust Ejection System:
Evaluate the ejection system of the mold. Ensure that the ejection pins, ejector plates, or stripper plates are properly aligned and functioning correctly. Adjust or replace their positions if necessary to achieve uniform ejection and minimize marks.
Optimize Cooling System:
Proper cooling of the mold is crucial in minimizing ejected marks. Ensure the cooling channels are appropriately designed and positioned to provide uniform cooling across the mold surface. Optimize cooling time to allow the part to solidify adequately before ejection.
Enhance Mold Venting:
Insufficient mold venting can cause air or gases to be trapped, leading to ejected marks. Improve mold venting by adding venting channels or vents at appropriate locations in the mold to allow for the easy escape of air during ejection.
Adjust Injection Parameters:
Fine-tuning the injection parameters can help minimize ejected marks. Optimize injection speed, pressure, and temperature settings to ensure smooth and consistent material flow, reducing the chances of marks forming during ejection.
Modify Part Design:
If an ejected mark persists, consider modifying the part design. Smooth out sharp edges or corners that are prone to marks. Avoid thick sections that may cause differential cooling and warpage. Work closely with product designers to optimize the part geometry for improved ejection.
Material Selection:
Evaluate the material being used for injection molding. Some materials are more prone to ejector marks than others. Consider using materials with better flow properties or additives that reduce surface friction to minimize the occurrence of marks.
Surface Treatments:
Apply surface treatments to the mold or the molded part to reduce friction and improve ejection. These treatments include applying mold release agents and coatings or using textured inserts to reduce surface contact and facilitate smooth ejection.
Conduct Testing and Iterations:
Implement a systematic testing process to evaluate the effectiveness of the implemented solutions. Adjust based on the results obtained and iterate until the desired quality and appearance are achieved.
By following these steps and addressing the potential causes of ejected marks, you can minimize their occurrence and improve the quality of injection molded products.
How Do Injection Marks Affect The Product?
An ejected mark can have an impact on the quality and performance of injection-molded products in several ways:
- Aesthetics: Ejected marks can mar the appearance of the product’s surface. They create visible blemishes or imperfections that can be unsightly, especially in products where a smooth and flawless surface finish is desired. This can negatively affect the product’s overall aesthetic appeal and perceived quality.
- Functionality: In some cases, ejected marks can compromise the product’s functionality. Suppose the mark is located in a critical area or interferes with the part’s intended function. In that case, it can hinder proper assembly, impair the operation of moving components, or affect the fit and compatibility with other parts.
- Structural Integrity: An ejected mark can indicate areas of localized stress concentration or deformation on the part’s surface. These stress concentrations can weaken the product’s structural integrity, making it more susceptible to failure or reduced durability over time. An ejected mark can compromise the overall strength and reliability of the product.
- Surface Finish and Texture: Ejected marks can create uneven surface textures or rough areas on the product. This can affect the tactile feel of the product, making it less pleasant to touch or handle. In applications requiring a smooth or textured surface for functional or aesthetic reasons, the presence of ejected marks can be detrimental.
- Product Consistency: An ejected mark can also cause inconsistencies in the appearance and quality of injection-molded products. If marks occur inconsistently across a batch or production run, it can lead to variations in product quality, making it difficult to achieve uniformity and meet desired specifications. This can impact the product’s branding, customer satisfaction, and overall market acceptance.
Conclusion:
Manufacturers must address any ejected marks to ensure the final product meets the customers’ desired quality standards.
Hence, by implementing appropriate measures to minimize or eliminate ejected marks, such as optimizing mold design, refining ejection systems, or adjusting process parameters, manufacturers can enhance product quality, improve aesthetics, and maintain consistent performance.
Also Read: Sink Mark in Injection Molding: Reasons And Solutions


