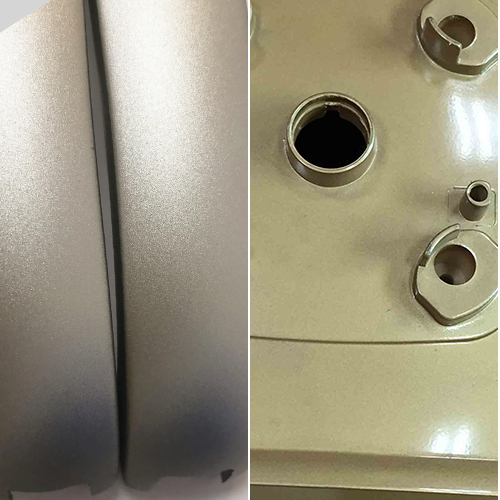
With the development of the injection molding industry, innovative techniques have emerged, pushing the boundaries of what’s possible in manufacturing. One such groundbreaking method is multi-shot injection molding. At Prototool, we’ve harnessed this advanced process, allowing for the creation of intricate and multi-material components in a single cycle. This offers unparalleled precision and design flexibility. In this article, we’ll delve into the nuances of this technique, shedding light on its benefits, design considerations, and its transformative potential in the realm of injection molding.
An Overview of Multi-Shot and Multi-Material Injection Molding Techniques
Introduction to Multi-Shot Injection Molding
Multi-shot injection molding, also known as multi-color injection molding, refers to the process where two or more colors or different materials are molded using a mold with one or more channels. Historically, dual-color injection molding was the pioneer in this field. A common example many of us interact with daily is the toothbrush. The handle of most toothbrushes is produced using dual-color injection molding, typically combining PP (hard plastic) with TPE (soft plastic). TPE is chosen because of its excellent compatibility with PP, and the soft plastic overlay enhances the grip.
Evolution with Product Complexity
As products became more intricate, the demand for tri-color and even quad-color molding began to rise. Generally, there are two types of tri-color machines: the two-station tri-color machine (colloquially known as the “pseudo tri-color”) and the three-station tri-color machine (known as the “true tri-color”). The distinction between the two isn’t about authenticity but rather the product structure design and the turntable control method adopted.
Two-Station vs. Three-Station Machines
- Two-Station Machines: As the name suggests, the turntable rotates and positions in two places, similar to the 180-degree turntable control method of the dual-color machine. In a two-station tri-color machine, two of the three injection units are injected simultaneously into the same mold. If two sections of the product don’t have adjacent boundaries (and can be designed to be molded simultaneously in the same mold), only two molds are needed to produce a three-component product.
- Three-Station Machines: These machines differ in that their turntable can be positioned in three places (120 degrees each). In a three-station tri-color machine, each of the three injection units is injected into a separate mold. If all three sections of the product have adjacent boundaries, then a three-station tri-color machine is used. Similarly, quad-color machines can also be categorized into “two-station” and “multi-station” machines. Technically, multi-station turntable control precision is notably higher than two-station, leading to a relatively higher production cost. Therefore, the most cost-effective solution should be chosen based on the product structure requirements.
Dual-Color Injection Molding Dynamics
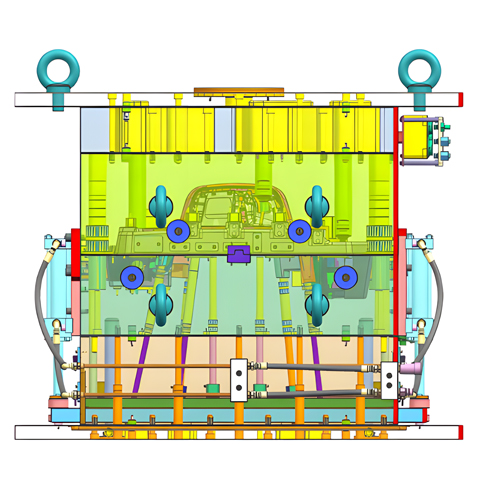
Dual-color molds typically consist of two parts. One half is fixed on the stationary platen of the dual-color injection molding machine, which is the side with the injection gate. The other half is mounted on the rotating platen, which is the side from which the mold ejects. Both molds’ rear cavities are usually identical, while the front ones differ. After the first material is injected into the first mold, the machine’s stationary and moving molds open. The rotating platen, carrying the rear parts of both molds, rotates 180 degrees. At this point, the semi-finished product from the first mold isn’t ejected. Instead, the molds close again, and the second material is injected. After cooling, the molds open, and the finished product from the first mold’s moving mold is ejected. This cycle produces one semi-finished and one finished product each time.
Categories of Multi-Shot Injection Molding Products
- Products formed by co-injecting two or more types of plastics.
- Products formed by co-injecting two or more colors.
- Injection molding of one type of plastic with an added medium, such as gas-assisted or water-assisted injection molding.
Advantages of Multi-Shot and Multi-Material Injection Molding
Dual-color and multi-color injection molding has become a focal point in the evolution of injection molding technology, and its benefits are manifold. Various techniques allow for different hardness and resilience within the same component. Soft plastics like TPE offer diverse color options, transparent surfaces, and other appealing features, enhancing aesthetic design. This method eliminates assembly steps, shortens the molding cycle, reduces processing costs, and offers added value to the end-users in terms of design, quality, and functionality.
Key Design Principles for Multi-Shot and Multi-Material Injection Molded Products
Design Distinctions in Multi-Color Products
Products made using multi-color injection molding have a significantly different structure compared to regular plastic products. When designing the structure and shape of these products, it’s essential to consider their intended use and purpose. It’s crucial to delve deep into the structural design of the injection-molded product, taking into account the compatibility features of the various materials used. Typically, the design aims to increase the contact area of the raw materials to enhance solidity. This can be achieved by incorporating numerous small recesses and protrusions within the product, which serve to increase the material’s contact area, thereby improving the product’s strength, lifespan, and practicality.
Methods of Joining Multi-Color Materials
In the design of multi-color/multi-material injection molded products, two primary methods are used to join adjacent components:
- Mechanical Fixation: This method doesn’t involve physical adhesion between adjacent materials. It generally involves connection points, utilizing the recesses or holes on the semi-finished product obtained from injection molding or the structural interconnection between two materials.
- Bonding: The joining in multi-color/multi-material injection molded products typically refers to the physical connection between two adjacent materials. While sometimes considered a chemical bond, thermoplastic materials don’t undergo significant chemical reactions. The bonding arises from intermolecular interactions (van der Waals forces) and molecular entanglement, where adjacent parts of large molecules intertwine, forming a mechanical connection.
Seal Position Design
The seal position refers to the junction or boundary between hard and soft plastics. A good design avoids a “feathered” appearance (i.e., the seal position shouldn’t gradually thin out), as overly thin edges can lead to poor adhesion and warping. Ideally, the design at the seal position should have a distinct step or recess to ensure consistent wall thickness. In some products, especially those with long flow paths or areas prone to wear, mechanical connections can be designed between the soft and hard plastics, ensuring a strong bond between the two materials.
Optimal Wall Thickness and Surface Texturing
Taking TPE overmolding as an example, given the high cost of TPE material, designers must consider cost reduction during product design by using a thinner TPE wall. The tactile feel of TPE is directly related to its wall thickness and hardness. When the TPE thickness is less than 1.5mm, the softness or hardness is primarily influenced by the hardness of the underlying hard plastic. Reducing the thickness of TPE can severely affect its bonding strength with the hard plastic, mainly because an overly thin TPE cools too quickly in the mold, leading to reduced adhesion strength.
Adding a textured finish to the surface of TPE products can give a leather-like feel, enhancing tactile sensation and masking surface imperfections. Some textures can also adjust the surface hardness of TPE products, making them softer or harder than when made with a smooth TPE surface. If designers polish the TPE surface to a mirror finish, it may exhibit many flow lines and color streaks, or it may turn white during use, degrading the surface quality.
Essential Mold Design Principles for Multi-Shot and Multi-Material Injection Molding
Mold Cavity Design
1. In multi-color molds, the shape of the front mold cavity varies, but the back mold cavity must be identical.
2. It’s imperative to ensure that after the back mold rotates around its center, it aligns perfectly with the front mold. This aspect requires careful attention during design.
Pre-design Considerations
3. Before designing the mold, it’s crucial to understand the parameters of the multi-color injection molding machine intended for mass production. This includes data like maximum/minimum mold capacity, mold thickness, and the distance between ejector pins.
4. The sprue of a three-plate mold should ideally be designed for automatic demolding. Special attention should be paid to ensure the reliable demolding action of the soft plastic sprue.
Material Selection and Compatibility
5. Choosing the right material is vital. Consider factors like the material’s adhesiveness, potential deformation during injection, and risks associated with melting.
6. When designing the cavity for the second injection, some voids can be incorporated to prevent the newly formed product from being scratched or scraped by the mold. However, it’s crucial to carefully assess the strength of each sealing position to ensure that no flash occurs due to high injection pressures.
Injection Considerations
7. The product from the first injection can be slightly oversized. This ensures a tighter fit during the second molding, achieving a better sealing effect.
8. It’s essential to consider whether the flow of plastic during the second injection might disturb the already molded product from the first injection, causing deformation. If this is a possibility, remedial measures should be taken.
Cooling and Ejection
9. The cooling channels in the mold cavity and core should be adequately and uniformly distributed.
10. In 99% of cases, the hard plastic part of the product is molded first, followed by the soft plastic part, primarily because soft plastic is more prone to deformation.
Adhesion and Surface Texture
11. To achieve tighter bonding between materials, consider the “stickiness” between materials and the roughness of the mold surface.
12. Provisions for venting during the first, second, or subsequent injections need to be thought out in advance to prevent defects and ensure quality.
Mastering Multi-Shot Injection Molding with Prototool
Multi-shot injection molding requires a high level of process and plant resources. This plastic-making method has changed how we design and make products, making them look and work better. As industries continue to seek innovative solutions, Prototool emerges as a leader in the field, specializing in plastic products and parts manufacturing using the two-shot injection molding process and multi-shot techniques. With a commitment to precision, quality, and cutting-edge technology, Prototool is not just a manufacturer but a partner for businesses aiming for excellence. As we navigate the future of plastic manufacturing, aligning with pioneers like Prototool ensures a journey marked by innovation, efficiency, and unparalleled expertise.

