Precision and adaptability are hallmarks of CNC prototyping, and the many available materials and CNC machines only add to these properties.
However, understanding the usage of CNC prototyping and how you can do it effectively is just as important as understanding the basics of this machining procedure.
If you’re unfamiliar with how it works and how to effectively manage CNC prototyping for producing effective prototypes, it may be challenging to deliver quality products in a manufacturing business. But don’t worry; we’ve got you covered with this detailed guide on CNC prototyping and when you should implement this machining process.
What is CNC Prototyping?
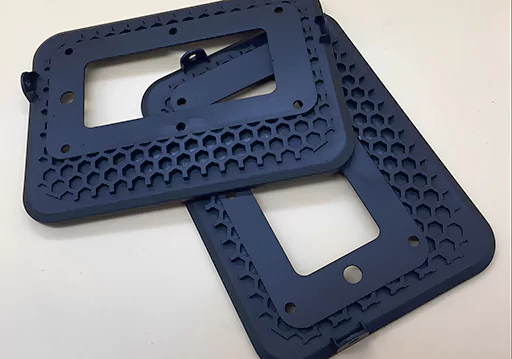
Prototype machining is a procedure that uses a CNC machine to make prototypes swiftly. Typically, the production batch is modest to provide a visual and functional replica of the final product. In other words, prototype machining determines the physical outcome of a computer design.
Manufacturers can more easily detect and eliminate design flaws with prototype machining before beginning large-scale production. Eliminating errors at this stage of product development aid in cost-effective manufacturing.
Importance of CNC Prototyping:
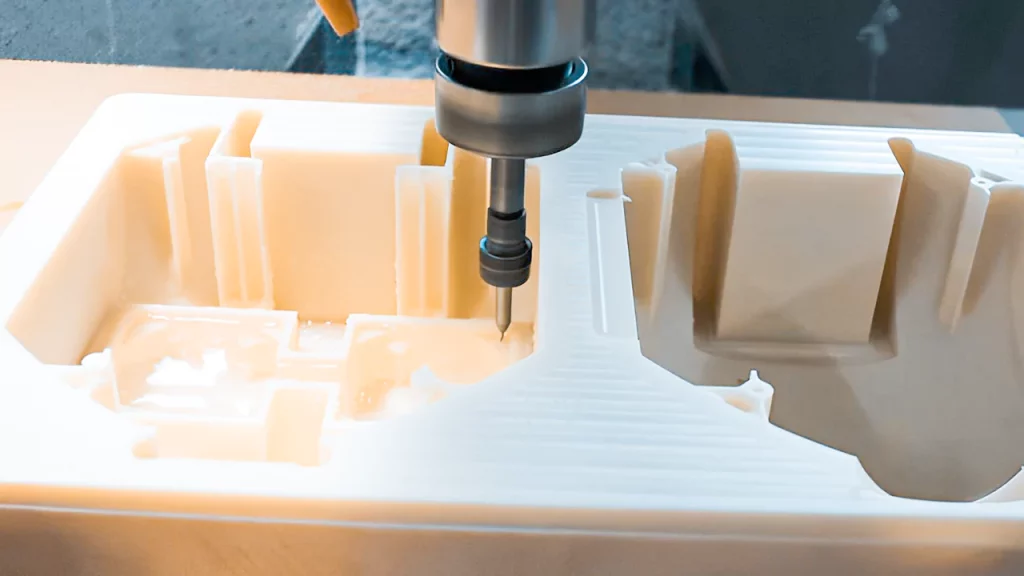
CNC milling is often regarded as the method of choice for prototyping and for a good reason. To begin, this method provides an exceptionally high degree of accuracy and precision due to the utilization of computerized controls that monitor the movement of the workpiece and the cutting tool.
These sophisticated controls examine your design from every conceivable perspective, ensuring that the developed prototype is an exact copy of the final product.
The speed of CNC is another advantage that makes it a suitable choice for prototyping. In contrast to other procedures, such as injection molding, which requires the manufacturer and product development to wait a few months before the tolerances and mold can be ready, this method does not require such a lengthy wait.
When using a CNC system, the prototyping process begins with creating a 3D CAD model of the end product, followed by its conversion into CAM files. While creating a prototype, the CAM files store the G Code that directs the movement of the CNC machine.
Limitations of CNC Prototyping:
Adopting the CNC process for prototyping is the best option in most circumstances. However, despite its numerous advantages, other CNC properties may be considered disadvantages. These disadvantages are as follows:
Geometrical Limitations:
A CNC prototyping machine cannot create geometries because it works from the outside. This is especially true for a prototype’s interior components. Other manufacturing technologies, such as additive manufacturing, work from the inside out, making them ideal for creating internal geometries.
Subtractive Technique:
Prototype CNC machining creates the finished product by eliminating material from the starting workpiece, making it a subtractive technique.
When compared to additive methods, which function by adding material to a workpiece to form the final item, this can result in increased material utilization. Because of increasing material utilization, machining centers incur more extraordinary material expenses.
High Costs:
CNC prototyping machine is more expensive than 3D printing because manufacturers incur greater material expenses. However, you must note that the additional cost of a CNC prototype comes with improved accuracy and the capacity to deal with a more extensive selection of materials.
In other technologies like 3D printing, the prototype is limited to plastics such as PLA. While PLA is significantly less expensive than metal blocks, its other properties only sometimes meet prototyping needs.
Technical Challenges
CNC prototype machining necessitates specialized technical skills. Making CAD files and running the CNC machine are required skills.
How To Determine the Need for CNC Prototyping?
Below are some key factors that can assist you in determining when a product part needs to undergo the CNC prototyping process:
- Size: The purpose of selecting the appropriate material block (stock) size and figuring out the CNC project’s most appropriate machine based on the prototype’s dimensions.
- Material: Regarding cost, less expensive plastics such as ABS will undoubtedly be more cost-effective than stainless steel; Nevertheless, CNC prototyping can utilize more cost-effective metals such as aluminum.
- Finishing Options: Options for finishing the part include leaving it in its machined state, bead blasting the part, anodizing the part, or plating the part. Which option do you prefer?
- Complexity: The item’s complexity determines how long it will take for a CNC machine to finish the part. For example, a product with challenging geometries or complicated extras like threaded holes or engraved brand names would take longer to finish. This may require a more sophisticated machine with an increased number of axes; as a result, the cost will be higher.
- Tolerance (accuracy): The prototyping project will be more expensive if the required part tolerance is more stringent, given that achieving finer precision requires a significantly longer time.
- Type of CNC Prototyping Machine: CNC turning machines are generally considered less expensive for prototyping than milling machines. However, CNC turning machines have limited uses, which may not meet your requirements.
- Quantity: Whether you order one prototype or a large number of components, the price of each part will decrease due to economies of scale. A CNC prototyping firm will consider the cost of setting up the machine into the project’s overall cost. Producing numerous parts simultaneously saves time since the machine does not require setup for each item. The time spent on the actual machining to produce the part remains the same, but the time spent on setting it up is reduced.
How To Prepare Quality CAD Models For CNC Prototype Machining Process?
The quality of the final product produced via CNC machined prototyping can vary based on the CAD file utilized. These designs transmit visual information as well as crucial component dimensions. As a result, prototypes that require high-quality parts rely on a high-quality model. Here are some pointers for creating CAD models and drawings:
Creating and Following An Effective Checklist
Creating an initial checklist of the designs and functionality you want to include in the prototypes is essential. Adding features while designing the CAD file is much simpler than attempting to edit the file later.
Finalizing Wall Thickness:
When developing drawings, pay attention to the most negligible possible wall thickness. Excessively thin walls can reduce the mechanical stability of CNC bespoke parts, which might manifest as a lack of strength.
Maintaining a metal wall thickness larger than 0.8 millimeters at all times is generally accepted. A recommended thickness greater than 1.5 millimeters is advised for plastic wall construction.
Design Elements Optimization:
Optimizing design aspects like cavities and holes is essential when working with CNC machines. For example, during end milling, the maximum achievable depth is equal to three times the diameter of the tool. As a result, the diameters of these cavities should be specified and limited.
Use the Appropriate Computer-Aided Design Software
The widespread use of CAD in manufacturing has led to the development of various CAD software that manufacturers can utilize to create unique prototypes in multiple fields. While some are effective, others can be overly difficult or restrictive.
Therefore, you must select the appropriate CAD applications for your particular industry. The CAD software appropriate for mechanical engineers and the sheet metal forming process may be less effective for architectural design and vice versa. Locate the CAD program that best meets the requirements of your specific prototype.
Simplifying Drawings
Computer-aided design (CAD) enables the design of the identical prototype in multiple ways. Keep your drawings straightforward to cut down on unneeded machining stages. When working on complicated components, it is best to break the drawing into two distinct sections that may be brought together later.
Conclusion:
Manufacturers often use samples to cut costs and head off problems that could happen in the future. It would be best to use CNC milling machines to make prototypes to move forward in the testing phase.
By following this article, you can make practical prototypes for creating quality products.


