In the intricate world of injection molding, ensuring the precision and functionality of a mold is paramount. This checking step, sometimes called a “mold test” or “trial,” is crucial for making sure the final product turns out right. As we delve deeper into this realm, we’ll explore the critical stages of mold trials, namely T0, T1, T2, and beyond, shedding light on their significance and the nuances that set them apart.
The Purpose and Stages of Mold Trials
The mold trial process is a critical step in ensuring that a mold can produce qualified products, operate under normal production conditions, and meet the designed lifespan and production requirements. It sets standards for product quality, mold structure, and injection molding process requirements. By understanding these standards, the mold’s quality is assessed, and through training, one gains insights into the mold trial process and its key considerations.
Understanding the Mold Trial Stages
- T0 Mold Trial: This is the initial internal testing phase conducted by the factory. It provides a preliminary understanding of the mold’s basic functionalities and identifies any major issues or defects. The primary goal is to ensure the mold’s basic operation and make necessary adjustments before presenting it to the client.
- T1 Mold Trial: This stage offers the client their first real look at the mold’s performance. It’s a more comprehensive assessment, focusing on the mold’s functionalities and the quality of the product it produces. The client assesses the mold under production-like conditions, ensuring that the mold can produce a product that aligns with the desired specifications.
- T2 Mold Trial: The T2 trial is about refining and perfecting the mold based on feedback and corrections from the T1 trial. It ensures that all adjustments have been implemented and that the mold can consistently produce the desired product.
- Beyond T2: Depending on the mold’s complexity and the precision required, further trials like T3, T4, and so on might be necessary. These subsequent trials aim to address any remaining issues and perfect the mold for optimal production.
By understanding the purpose and stages of mold trials, manufacturers can ensure that their molds meet the highest standards of precision and efficiency, aligning with CNC machining best practices.
Key Steps in the Mold Trial Process
The mold trial process, also known as mold testing or mold validation, is a systematic approach to ensure that a mold meets the desired specifications and can produce a product of the highest quality. Here are the essential steps involved:
1. Familiarization with Materials and Processes
Before diving into the mold trial, it’s crucial to understand the materials involved. This step involves studying the materials to be used, getting acquainted with the mold trial workflow, and identifying key points to watch out for during the trial.
2. On-site Practical Experience
There’s no substitute for hands-on experience. By visiting the mold trial site, one can gain firsthand knowledge of the actual testing process, observe the mold in action, and understand the intricacies involved.
3. Comprehensive Mold Inspection
This step is about meticulous scrutiny:
- Mold Appearance: Check the mold’s external appearance for any visible defects or irregularities.
- Mold Materials: Examine the materials used in the mold’s construction to ensure they meet the required standards.
- Injection System: Assess the gating system to ensure smooth flow and optimal filling.
- Mold Functions: Evaluate various mold functionalities like mold support, resetting, core pulling, part ejection, and more.
- Ventilation and Cooling Systems: Ensure that the exhaust and water circulation systems function effectively.
- Injection Molding Process: Review the injection molding technique used and ensure it aligns with best practices.
- Product Assessment: Examine the product’s appearance, dimensions, and functional compatibility to ensure it meets the desired specifications.
By following these steps, one can ensure that the mold trial, or mold validation process, is thorough and that the mold is ready for full-scale production.
Preparations Before the Mold Trial
Before initiating the mold testing or validation process, it’s essential to ensure that all prerequisites are met. This not only ensures a smooth mold trial but also guarantees the production of high-quality products. Here are the steps and considerations to take into account:
1. Mold Design Phase
During the mold design phase, it’s crucial to:
- Engage in technical discussions with the mold manufacturer to confirm the mold’s compatibility with the intended machinery.
- Establish production capacity requirements and decide whether to opt for automated production.
- Determine the mold’s lifespan and set the shrinkage rate for the product material.
- Evaluate the mold structure, especially the method of introducing the material, and design the PL line accordingly.
- For critical appearance parts, request the mold manufacturer to conduct a flow analysis. This helps in anticipating potential defects in the mold during production and assessing them.
2. Before the First Mold Trial
Once the mold is manufactured and before the first mold trial, ensure:
- The mold has reinforced protective devices, such as a forced reset mechanism or a limit switch mechanism for the ejector plate. These mechanisms prevent damage to the mold under abnormal conditions.
- The mold’s ejection and reset mechanisms are fully installed. Common mechanisms include the pull rod system (check for balance and the sufficient number of pull rods) and the hydraulic cylinder system. Sometimes, there might be a pneumatic auxiliary ejection.
- Molds with sliders should have oil grooves at the slider’s moving parts.
- After installing the mold on the injection molding machine, don’t rush to adjust the mold. Instead, set the injection molding machine to manual mode and manually execute each mold action, including:
- Ejector pin ejection: Ensure smooth and balanced ejection, check if the position is adequate for product release, and listen for any unusual friction sounds.
- Ejector pin reset: Ensure the pin can reset properly. If not, it could damage the mold cavity.
- Check if the ejector pin has a limit device and if the slider can slide into place.
- Ensure the mold can close and open normally.
Once the above checks are complete, you can proceed with mold adjustments.
3. Comprehensive Product and Assembly Check
Apart from checking the sample’s dimensions and appearance, it’s essential to consider a holistic assembly confirmation. Whenever conducting a mold trial, try to bring all assembly parts. This comprehensive assembly check provides a direct understanding of any assembly issues with the trial product. It also facilitates the analysis and modification of existing assembly problems, streamlining the process and saving time.
4. Mold Acceptance and Trial Summary
Before moving to full-scale production, ensure:
- All identified issues are resolved, and the mold can produce a specified quantity (e.g., 5000 units) without any problems on the designated machine.
- Identify the mold’s wear-prone parts and request the mold workshop to provide spare parts to prevent production disruptions.
- Apply anti-rust paint to the exposed parts of the mold and label the mold appropriately.
- The product surface should be free from defects like short shots, burns, whitening, flow marks, burrs, bubbles, weld lines, shrinkage, and snake-like patterns.
Mold Appearance and Specifications Requirements In Mold Trial
Ensuring the mold’s appearance and specifications are up to standard is crucial for efficient mold trials and subsequent production processes. Here’s a detailed breakdown of the essential criteria to consider:
1. Mold Labeling and Identification
- The mold’s name should be complete, with clear and neatly arranged characters.
- Any marking in English characters and numbers should be larger than 5/6. They should be positioned approximately 10mm from the water nozzle, ensuring clarity, aesthetics, and uniform spacing.
2. Cooling System Specifications
- Cooling water nozzles shouldn’t protrude from the mold frame’s surface.
- Each cooling water nozzle should have clear inlet and outlet markings.
3. Mold Accessories and Support
- Mold accessories shouldn’t interfere with the mold’s lifting and storage. If there are exposed cylinders, water nozzles, or pre-reset mechanisms underneath during installation, they should be protected by support legs.
- Support legs should be securely fastened to the mold frame using screws. If the support legs are too long, they should be threaded and tightened to the mold frame.
4. Ejection and Positioning
- The size of the mold’s ejection hole should meet the specified injection molding machine’s requirements. Except for small molds, a single central ejection shouldn’t be used.
- Positioning rings should be securely fixed. They typically come in diameters of 100mm and 250mm and should protrude 10-20mm from the base plate unless otherwise specified.
5. Mold Dimensions and Orientation
- The mold’s overall dimensions should comply with the specified injection molding machine’s requirements.
- Molds with specific directional requirements should have arrows marked on the front or rear template to indicate the installation direction.
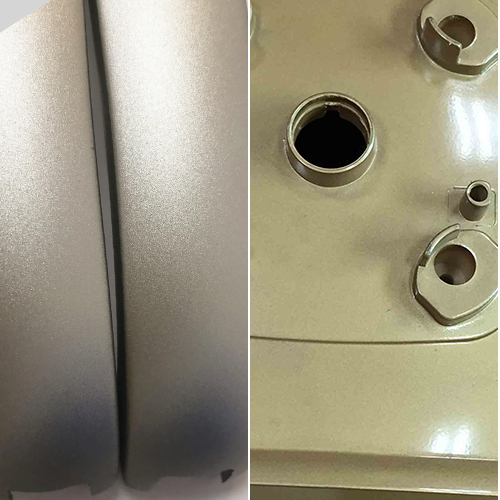
6. Mold Surface and Handling
- The mold frame’s surface should be free from dents, rust, excess lifting rings, water and oil holes, and other defects that might affect its appearance.
- The mold should be designed for easy lifting and transportation. During lifting, mold components shouldn’t be disassembled, and lifting rings shouldn’t interfere with water nozzles, cylinders, or pre-reset rods.
Ejection, Resetting, Core Pulling, and Part Retrieval Requirements In Mold Trial
Ensuring the mold’s ejection, resetting, core pulling, and part retrieval mechanisms are efficient and reliable is essential for a successful mold trial and subsequent production. Here’s a detailed breakdown of the essential criteria to consider:
1. Ejection Mechanism
- Ejection should be smooth, without any obstructions or unusual noises.
- The surface of the angled ejector should be polished, and it should be lower than the core surface.
- All ejector pins should have rotation stops and be numbered.
- The ejection distance should be limited using stop blocks.
- Ejector pins shouldn’t move up and down.
- If hooks are added to the ejector pins, their direction should be consistent, and they should be easily removable from the product.
- The space between the hole and the pin, the length of the seal area, and the smoothness of the hole should all match the set standards.
- If the product tends to follow the angled ejector during ejection, grooves or etchings should be added to the ejector pins.
2. Resetting and Core Pulling Mechanism
- Sliding parts should have oil grooves, and their surfaces should undergo nitriding treatment.
- Reset springs should be standard parts, and neither end of the spring should be ground or cut.
- Sliders and core pulls should have travel limits. Small sliders can be limited using springs, and set screws can be used when springs are inconvenient. Cylinder core pulls must have travel switches.
- Sliders and core pulls generally use angled guide posts. The angle of the guide post should be 2°-3° less than the angle of the slider locking surface. Long-travel sliders should use cylinder extraction.
- Large sliders wider than 150 mm should have wear plates underneath. The wear plate should be 0.05-0.1 mm higher than the main surface and have oil grooves.
3. Part Retrieval and Other Considerations
- The end face of the return rod should be flat, without spot welding. The base of the blank head shouldn’t have pads or spot welds.
- In a three-plate mold, the sprue plate should slide smoothly and be easily pulled apart.
- In a three-plate mold, the tie rods should be placed on both sides of where the mold is set up. If not, add an outer plate to make sure it doesn’t get in the way of the person using it.
- Oil and air channels should be unobstructed, and hydraulic ejection resetting should be in place.
- Exhaust ports should be opened at the bottom of the guide bushing.
Cooling and Heating Systems Requirements In Mold Trial
The efficiency of a mold trial is significantly influenced by the mold’s cooling and heating systems. Ensuring these systems are optimal can lead to better product quality and reduced cycle times. Here’s a detailed overview of the essential criteria for these systems:
1. System Efficiency
- The cooling or heating system should be fully unobstructed, ensuring efficient temperature regulation during the mold trial process.
2. Sealing and Maintenance
- The system’s sealing should be reliable. Under a pressure of 0.5MPa, there should be no leakage, ensuring the mold’s safety and efficiency.
- Sealing grooves opened on the mold frame should meet relevant standard requirements in terms of size and shape.
- When placing sealing rings, they should be lubricated with yellow grease and should protrude above the mold frame surface after placement. This ensures a tight seal and easy maintenance.
3. Material Considerations
- The spacers for water and oil flow channels should be made of corrosion-resistant materials. This ensures longevity and reduces the risk of contamination during the mold trial.
4. Centralized Water Supply
- Both the front and back molds should adopt a centralized water supply method. This ensures uniform cooling or heating, leading to consistent product quality.
Gating Systems Requirements In Mold Trial
The gating system plays a pivotal role in the mold trial process, ensuring that the molten material is directed appropriately into the mold cavities. An efficient gating system ensures optimal product quality, minimizes waste, and reduces cycle times. Here’s a detailed overview of the essential criteria for gating systems:
1. Sprue Design
- The sprue’s placement should not affect the product’s appearance and should meet assembly requirements.
- The cross-section and length of the runners should be rationally designed. While ensuring molding quality, the process should be as short as possible, reducing the cross-sectional area to minimize filling and cooling times. The plastic loss in the gating system should be minimal.
2. Three-Plate Mold Considerations
- For three-plate molds, the runner’s section on the back of the front mold plate should be trapezoidal or semi-circular.
- On the sprue plate of a three-plate mold, the material head and runner inlet diameter should be less than 3 mm, with a 3 mm deep step recessed into the sprue plate at the ball head.
3. Manufacturing and Design Standards
- Sprues and runners should be machined according to drawing specifications, with no allowance for grinding machine processing.
- Point gate sprues should adhere to standard requirements.
- The front end of the sub-runner should have an extended section serving as a cold slug well.
- The Z-shaped undercut on the pull rod should have a smooth transition.
- The sub-runner on the parting surface should be circular, ensuring alignment between the front and back molds.
4. Quality and Aesthetics
- Submerged gates on the push rod should have no surface shrinkage.
- Transparent product cold slug well diameter and depth should meet design standards.
- The material head should be easy to remove, leaving no gate marks on the product’s appearance and no residual material head at the assembly point.
- For hook-type submerged gates, both parts of the insert should undergo nitriding treatment for enhanced durability.
Molding Components, Parting Surface, and Exhaust Grooves Requirements In Mold Trial
Ensuring the precision and quality of the molding components, parting surface, and exhaust grooves is crucial for a successful mold trial. These parts are crucial for deciding how good, nice-looking, and useful the final product is. Here’s a detailed overview:
1. Surface Quality and Aesthetics
- The front and back mold surfaces should be free from irregularities, dents, rust, or any other defects that might affect appearance.
- The parting surface should remain clean and tidy, with no depressions in the sealing areas.
- Exhaust grooves should have a depth less than the plastic’s flash value, and about 10mm away from the parting surface, the depth of the grooves can be increased.
2. Inserts and Positioning
- Inserts should fit accurately, be easily placed, and be reliably positioned.
- Components like inlays and cores should be securely positioned and fixed. Circular parts should have anti-rotation features, and there should be no copper or iron shims beneath the inlays.
- The end face of the push rod should align with the core.
- The front and back mold-forming parts should be free from undercuts or chamfers.
3. Identification and Symmetry
- For multi-cavity molds producing symmetrical parts, the products should be marked with “L” or “R” for left and right, respectively. If there are specific position and size requirements, they should be met, generally added where it doesn’t affect appearance or assembly.
- The mold frame clamping surface should be adequately matched, with over 75% of the area in contact.
- Pushrods should be positioned closer to the sidewalls and next to ribs or bosses, using larger push rods when necessary.
- Identical parts should be marked with sequential numbers like 1, 2, 3, etc., for differentiation.
4. Precision and Standards
- All mating surfaces, insert surfaces, and parting surfaces should be precisely matched.
- The sealing portion of the parting surface should adhere to design standards.
- Textures and sandblasting should be uniform and meet the required standards.
- For products with specific appearance requirements, screws on the product should have shrinkage prevention measures.
- When the front mold inserts into the back mold or vice versa, there should be beveled locking around the edges and machined clearances.
Injection Molding Production Process Requirements In Mold Trial
The injection molding production process is a pivotal phase in the mold trial journey. Ensuring that the mold operates efficiently and consistently under standard injection molding conditions is crucial. Here’s a comprehensive overview of the key considerations during this phase:
1. Stability and Repeatability
- Within the standard injection molding process parameters, the mold should exhibit stability in production and repeatability in adjusting process parameters.
2. Injection Pressure
- During mold injection production, the injection pressure should generally be less than 85% of the injection machine’s rated maximum injection pressure.
3. Injection Speed
- The injection speed during mold injection production should ensure that the speed for three-quarters of the injection stroke is not less than 10% of the rated maximum injection speed or exceeds 90% of it.
4. Holding Pressure
- When using the mold injection, the pressure should usually be kept below 85% of the highest possible pressure.
5. Clamping Force
- When using the mold injection, the holding power should be kept under 90% of the machine’s recommended strength.
6. Product and Sprue Removal
- During the injection production process, the removal of the product and the sprue material should be easy and safe, with each process typically not exceeding 3 seconds.
7. Inserted Parts in Molds
- For molds producing parts with inserts, the installation of these inserts during production should be convenient, and their fixation must be reliable.
In Conclusion:
The intricate process of mold trials, from the initial stages to the final injection molding production, is a testament to the precision and expertise required in the world of manufacturing.
Every step, from design and looks to cooling and making, is key to making sure the final product is top-quality and works well. As technology gets better, the methods and details of mold tests will also change. However, the foundational principles, as outlined in this article, will remain crucial for anyone venturing into this specialized field. Whether you’re a seasoned expert or a newcomer, always remember the importance of meticulous attention to detail, continuous learning, and the relentless pursuit of perfection in every mold trial.